Your hair routine should not eat up your morning, and it does not have to. If you have been reaching for the same low ponytail because nothing else feels doable before coffee, you are not alone. Thinning strands, gray regrowth, or hair that has changed texture over the years can make old updo tricks stop working the way they used to. The good news is that easy updos for women over 50 exist in plenty, and most take less time than blow-drying your bangs. These styles work with shorter layers, finer strands, and hair that has lost some of its grip, instead of fighting against them. Some use a claw clip. Others need nothing but bobby pins and a little dry texture spray. Pick a few that match your hair length and texture, practice them twice, and you will have a rotation that gets you out the door looking put together, not rushed.
Low Twisted Chignon
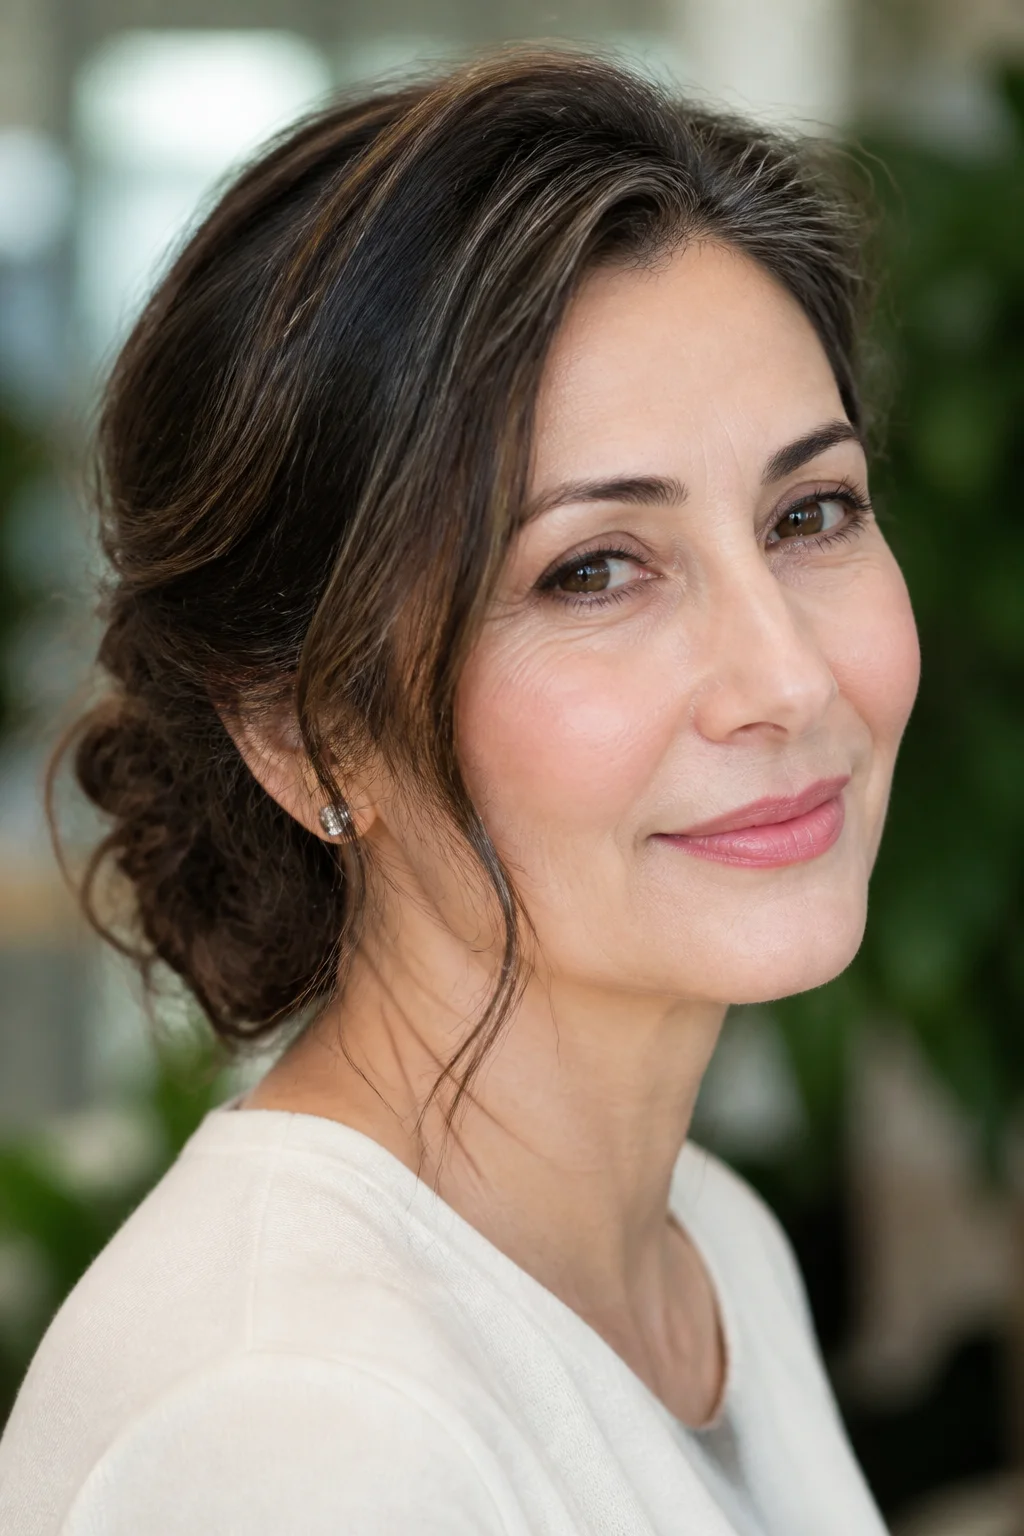
Gather your hair at the nape of your neck and twist the ponytail into itself until it coils into a low knot. Pin the ends underneath so nothing pokes out, then mist with a light-hold spray. This one sits close to the head, which flatters a shorter neck and stays neat through a full day of errands. It works on straight or wavy hair and looks intentional even without a mirror check-in. Tip: rough up the front pieces with your fingers before you twist so the whole thing does not look too stiff. A light mist of heat protectant before styling helps the finish last.
Classic French Twist
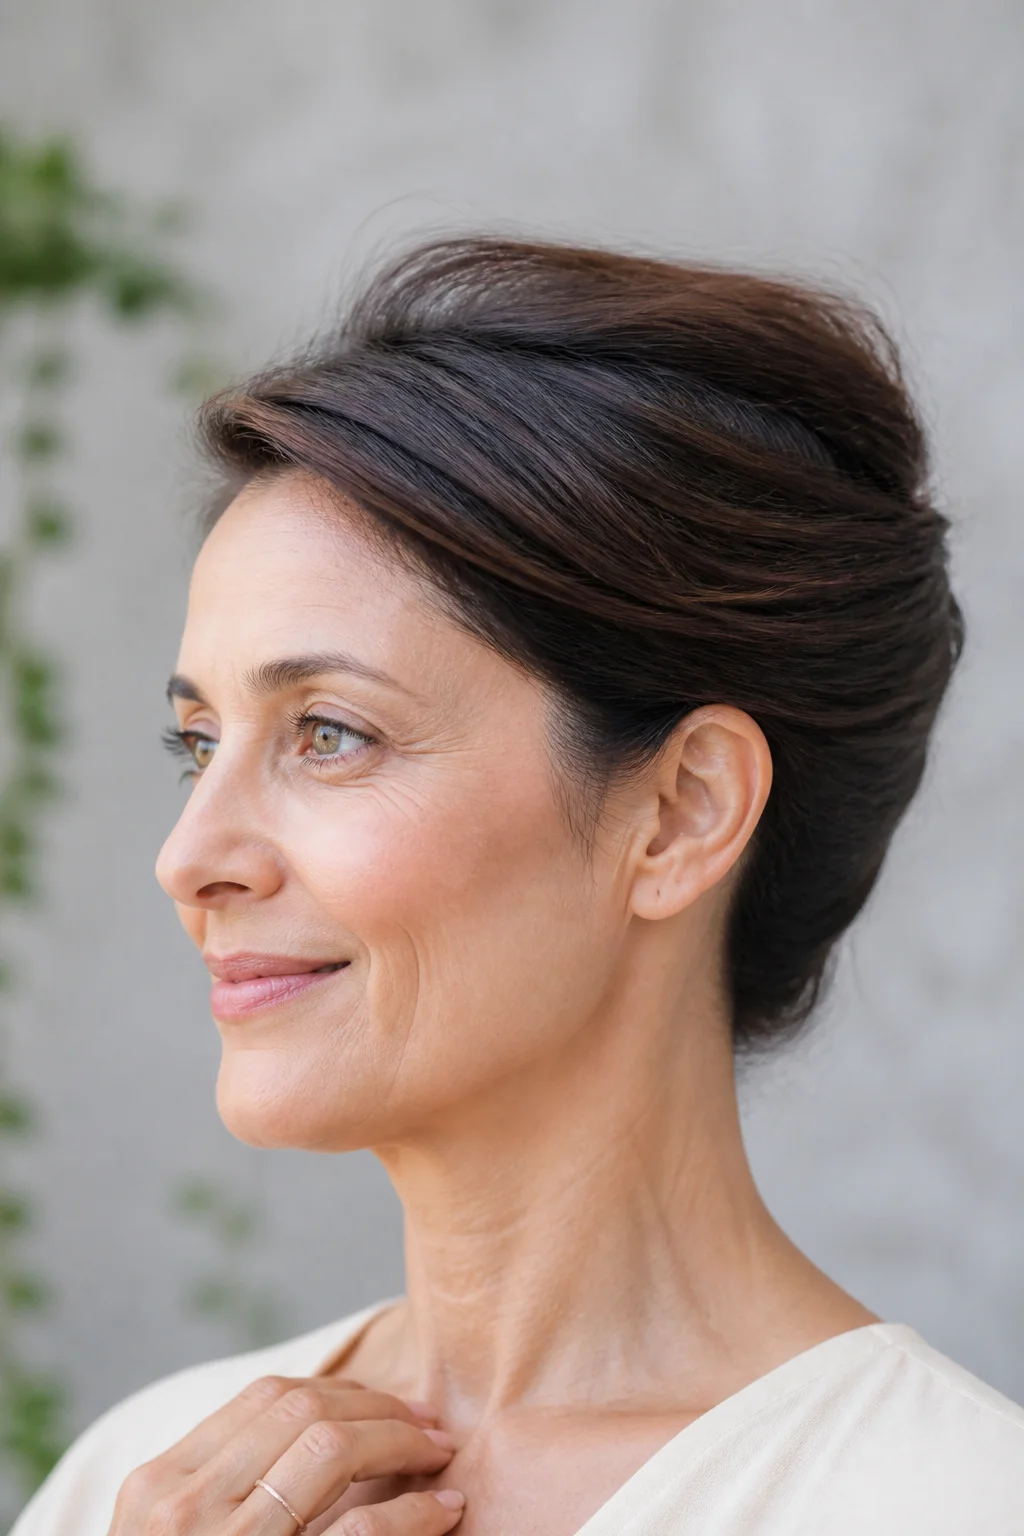
This is the updo your mother probably wore to weddings, and it still earns its place. Comb your hair back, sweep it to one side, and roll it into a vertical twist, pinning as you go up the seam. The finished shape looks like a smooth column at the back of your head. It reads formal enough for a dinner out but takes only a few minutes once your hands learn the motion.
Claw-Clip French Twist
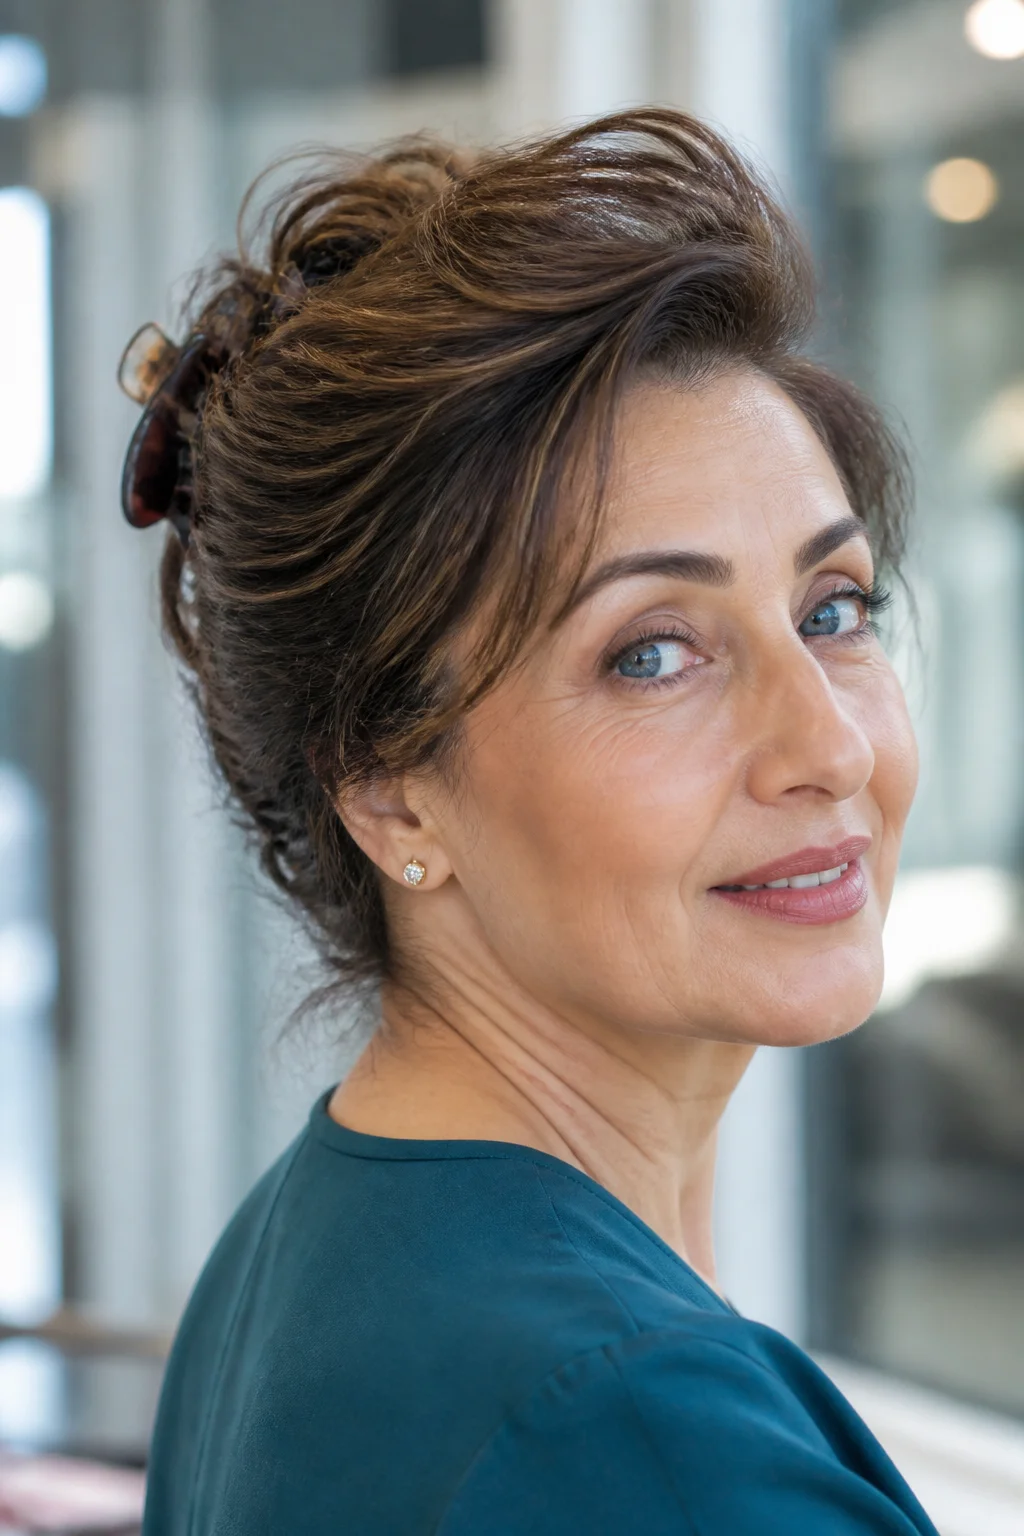
Skip the pins entirely and let a claw clip do the twisting for you. Gather your hair, twist the length upward the way you would for the classic version, then clamp the clip over the fold to hold it in place. This shortcut is ideal on days when your fingers are not cooperating or you are getting ready in the car. Tip: choose a clip in a matte finish so it blends with your color instead of standing out like an accessory.
High Ballerina Bun
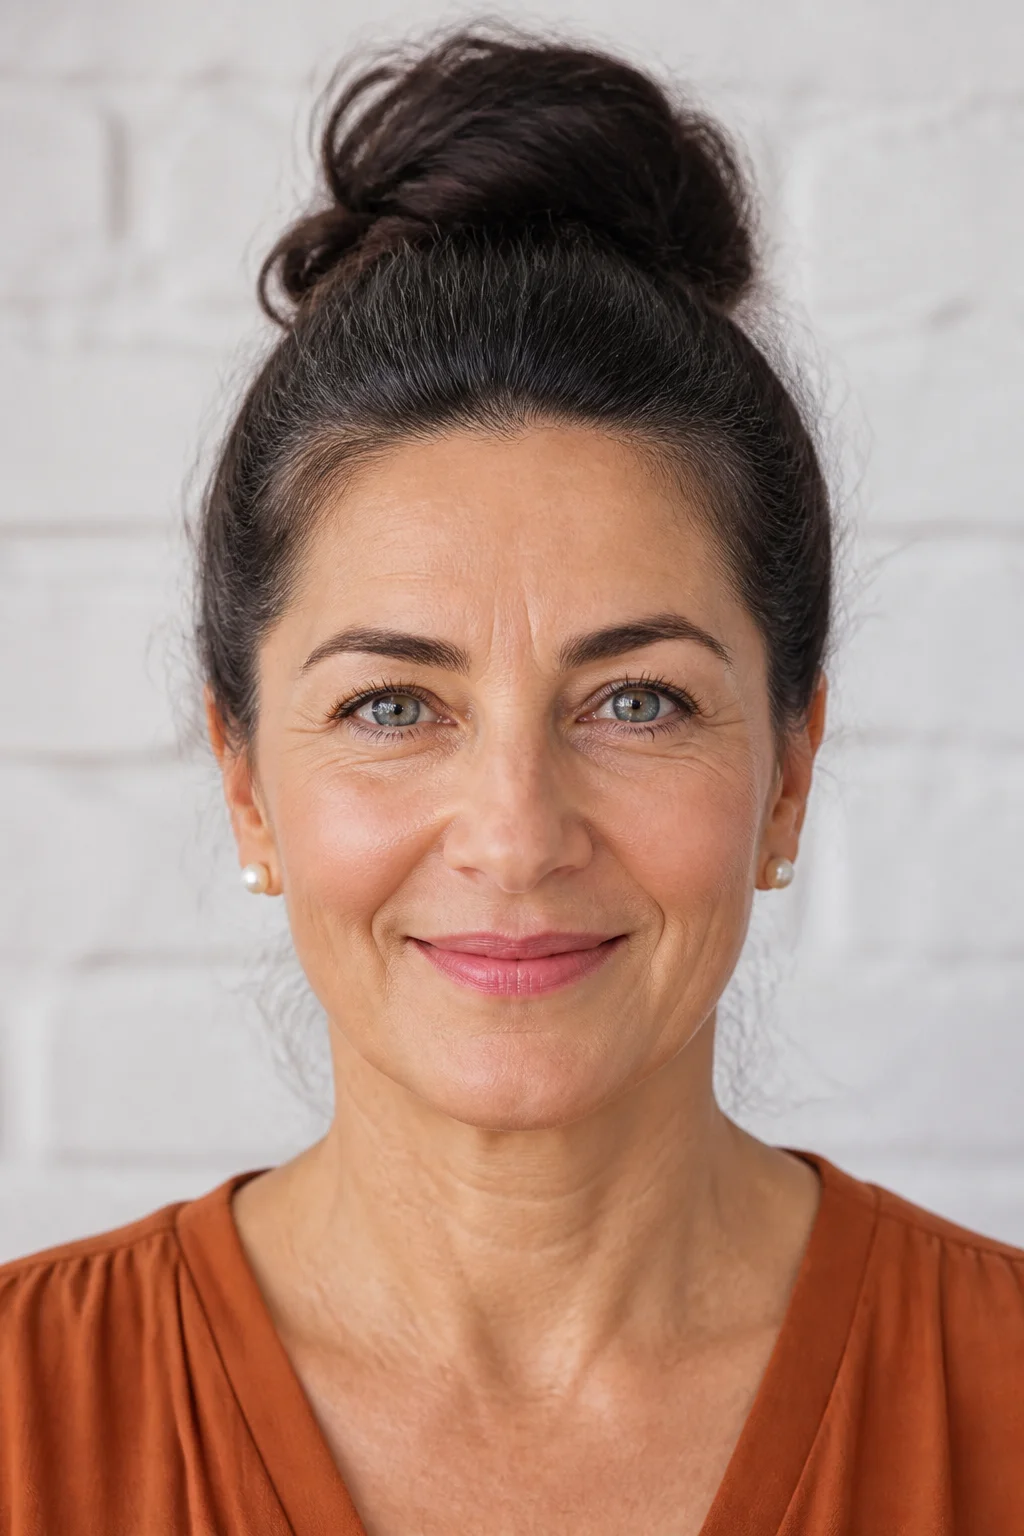
Pull your hair straight up into a high ponytail, twist it, and wrap it around the base into a tight bun. Secure with pins around the edge so no loose ends show. This style lifts the face and works well for workouts, errands, or any day you want your hair fully off your neck. Fine hair benefits from a little dry shampoo at the root first, since it gives the twist something to grip.
Relaxed Messy Bun
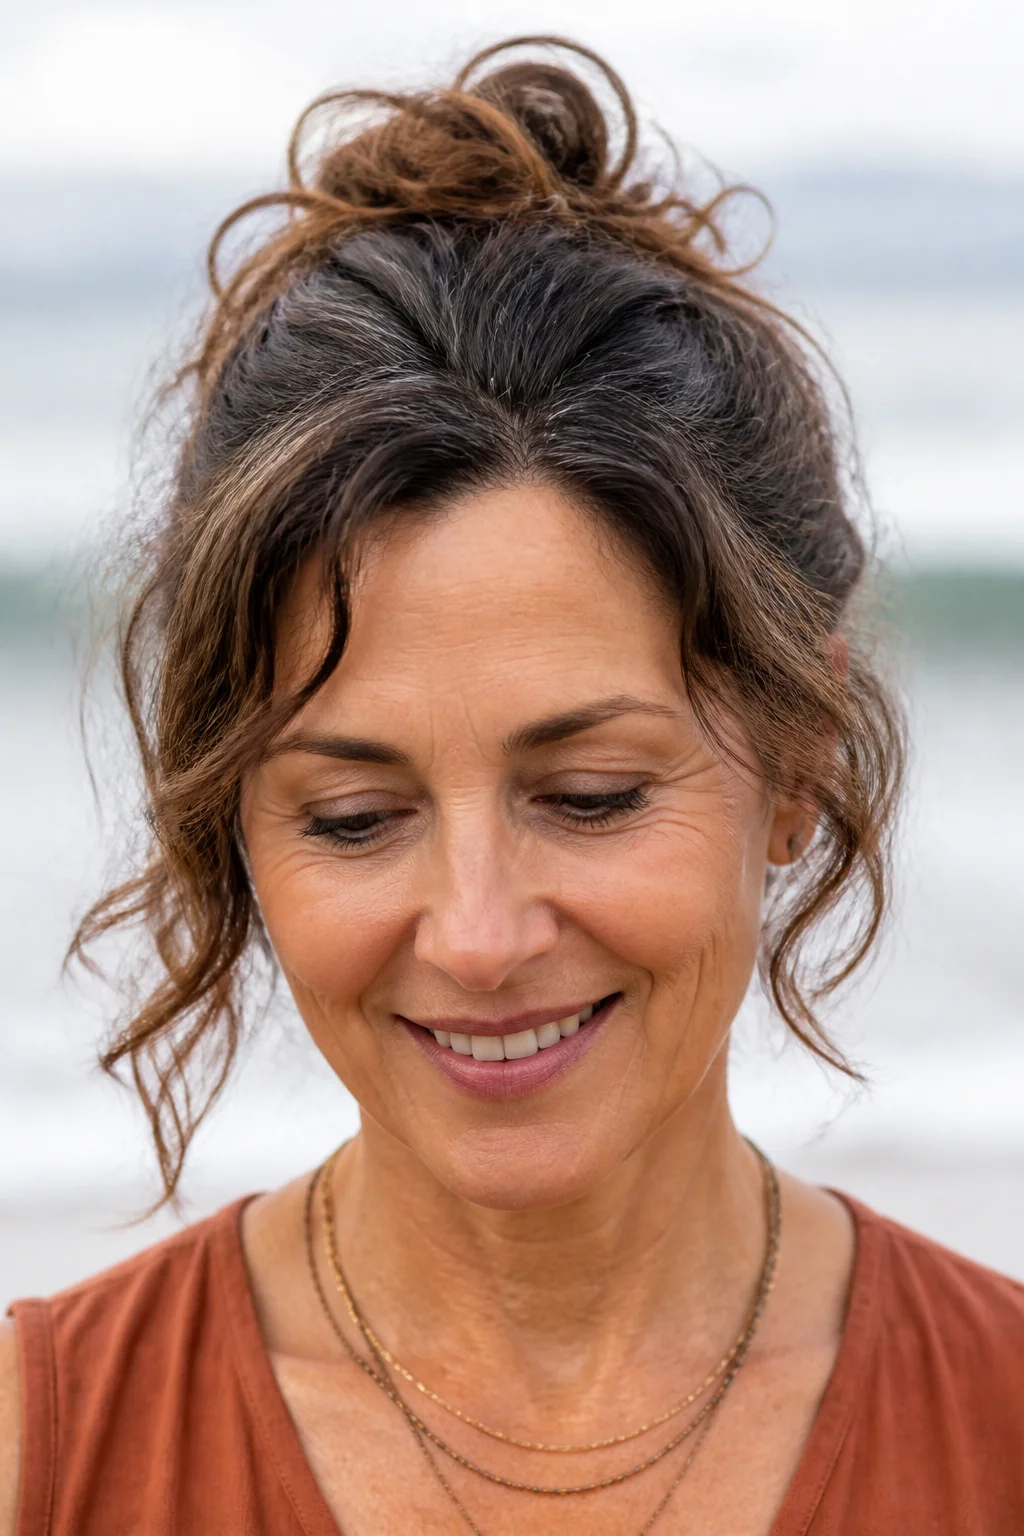
Twist a low or mid-height ponytail loosely and let some pieces fall out on purpose. This is the updo for days when your hair has second-day texture already working in your favor. Tug a few strands loose around your face after pinning so the shape does not look too tight or too new. It takes under two minutes and hides regrowth lines better than a sleek style would.
Braided Low Bun

Braid your ponytail first, then coil the braid around itself into a bun at the nape. Pin around the perimeter to keep the shape secure through the day. The texture of the braid gives this style more visual interest than a plain twisted bun, and it holds up well even on hair that is fine or slippery. This one photographs beautifully from the back, which makes it a smart choice for family events or church.
Rope-Twist Bun
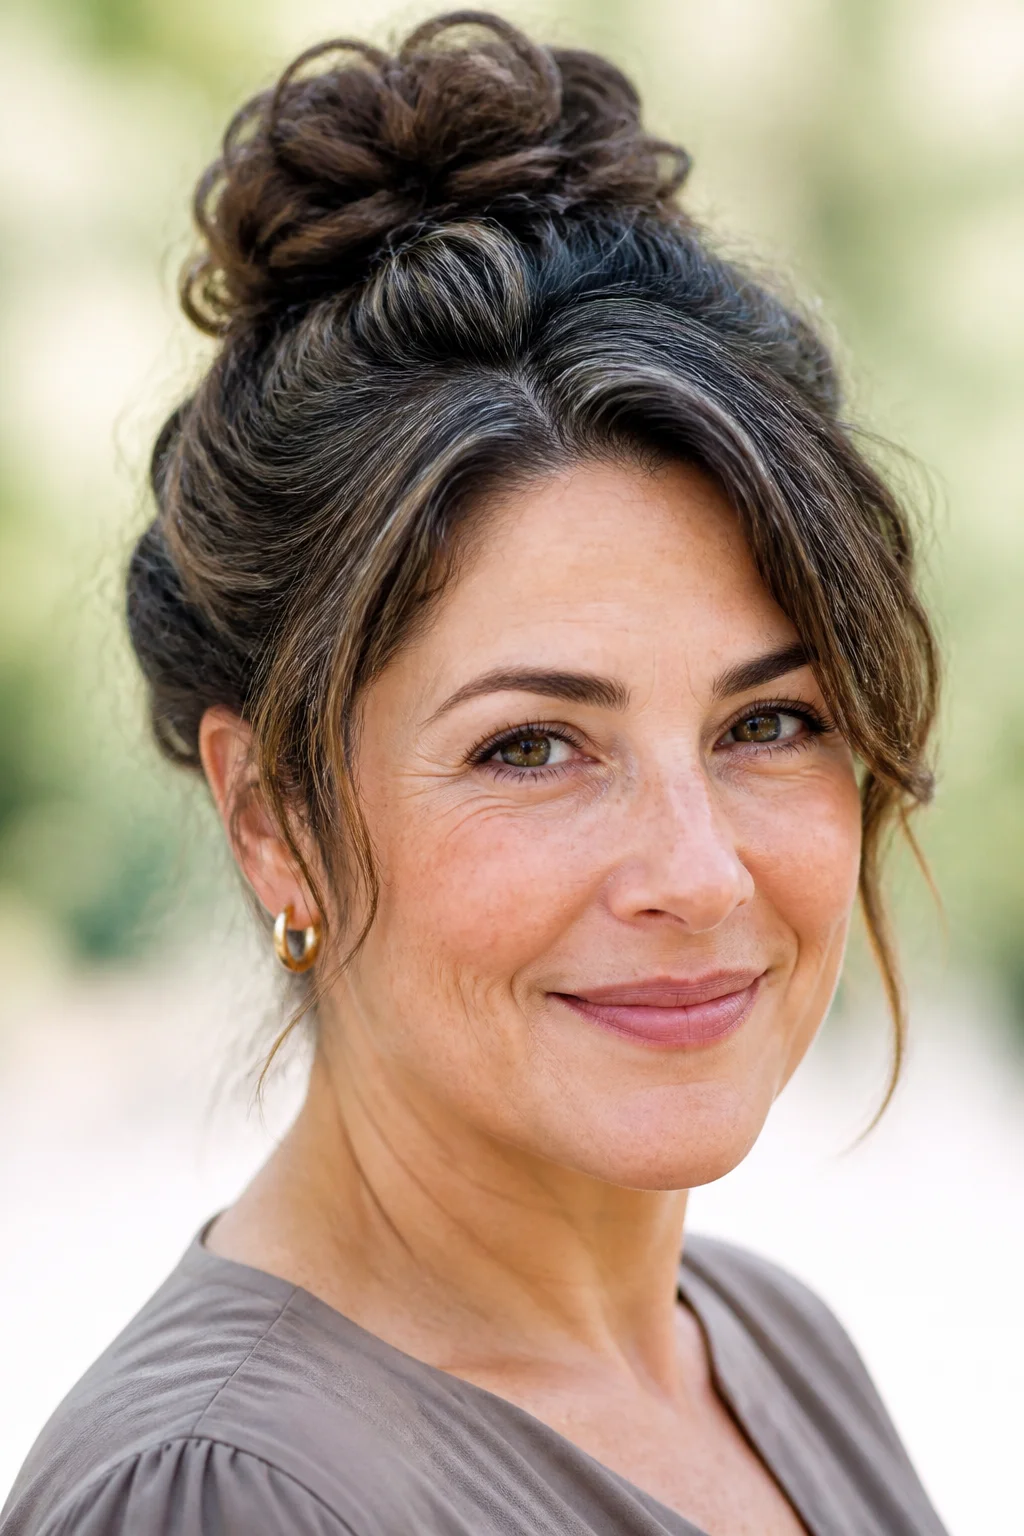
Split your ponytail into two sections, twist each one, then twist them together around each other before wrapping the whole rope into a bun. The result has a woven look without needing actual braiding skill. Pin it flat against your head and mist with hairspray to keep flyaways down.
Top Knot with Soft Volume
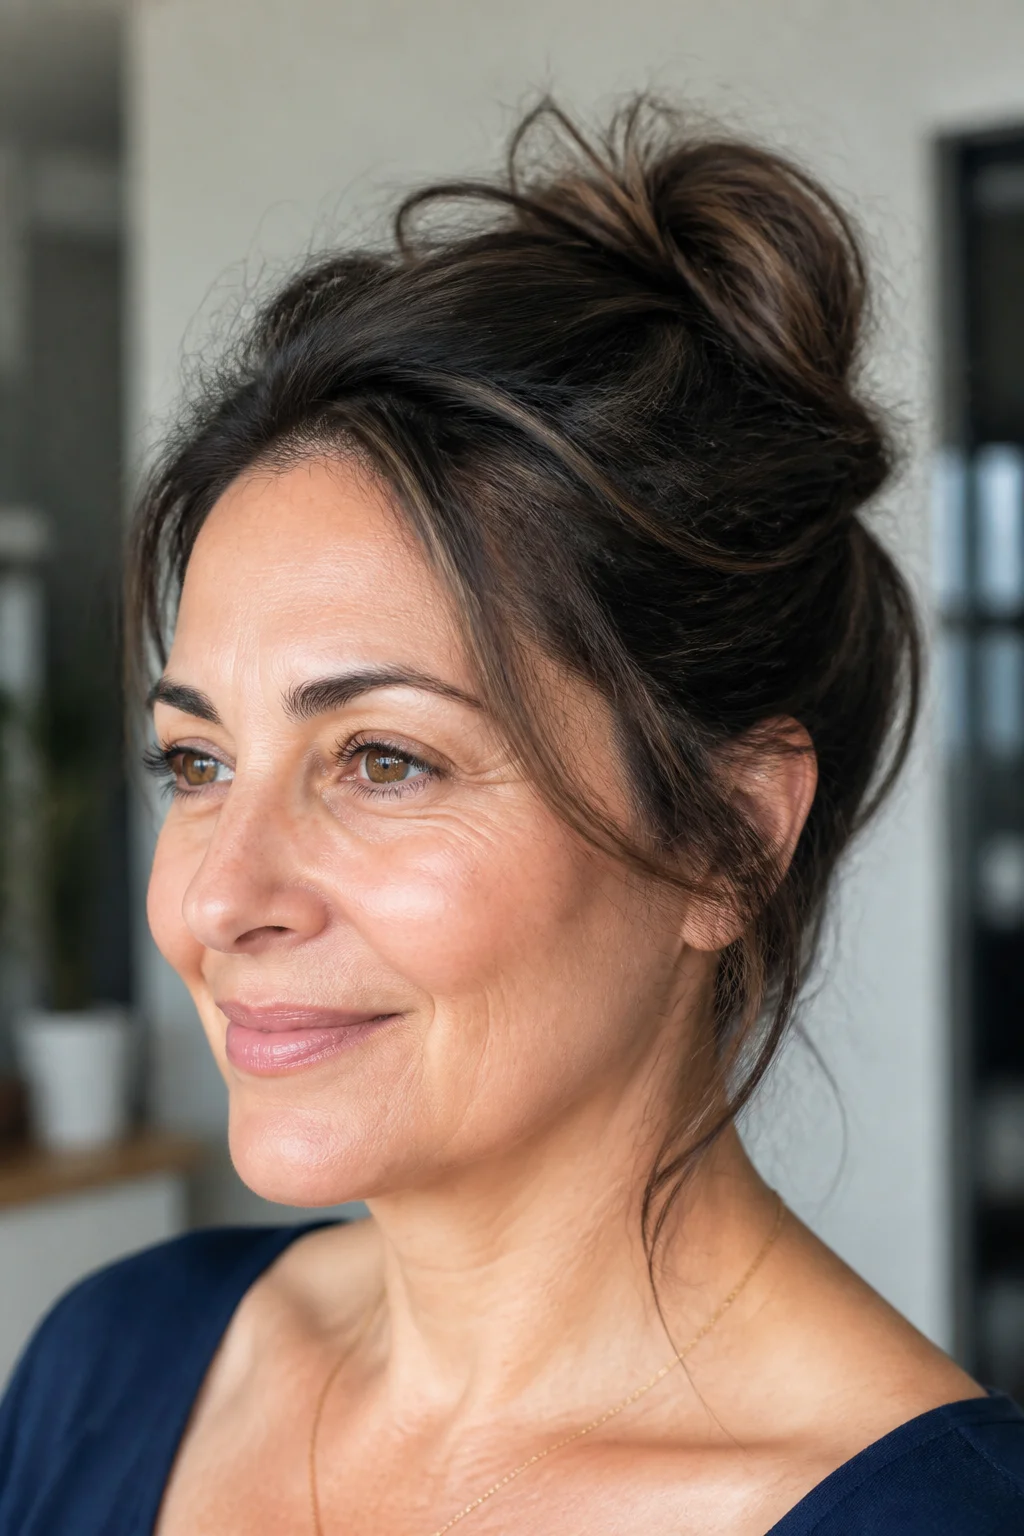
Instead of pulling every strand back tight, leave a little looseness at the crown before you twist your ponytail into a knot on top of your head. That small bit of volume softens the style so it does not look severe against a fuller face. Secure with a couple of bobby pins in a cross pattern for the most hold with the fewest pins. Tip: backcomb just the top section slightly before gathering your hair, so the crown has lift that lasts past noon.
Gibson Tuck
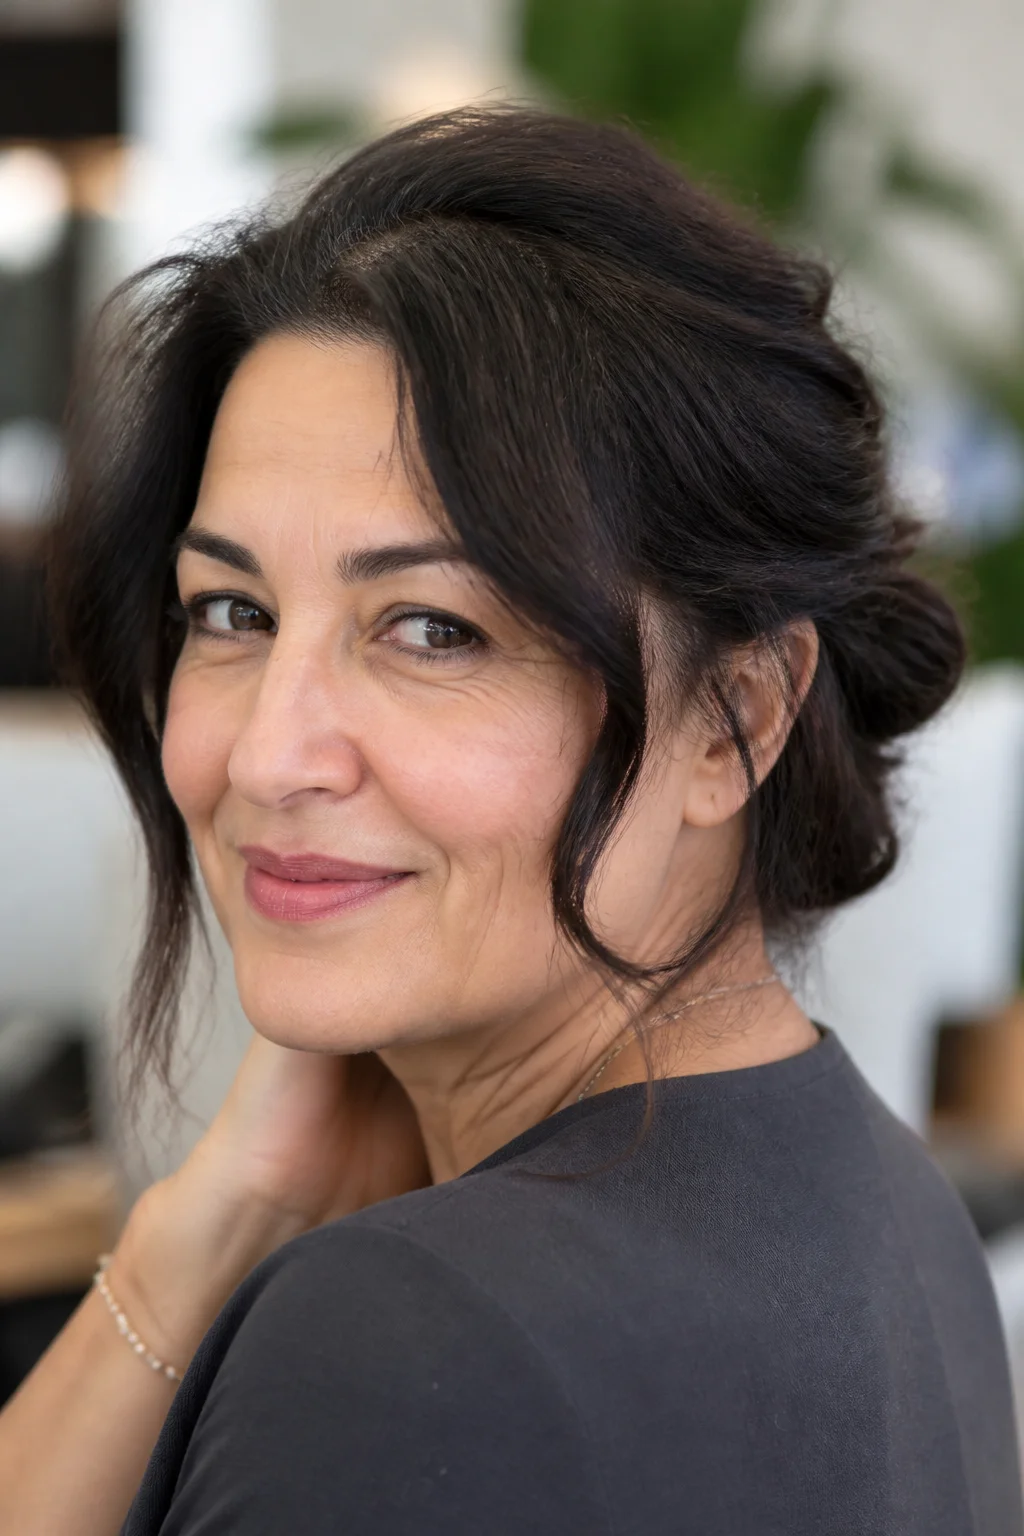
Flip your ponytail up and tuck the ends underneath a hidden band or a few bobby pins, so the length disappears into a smooth roll at the back. This is one of the fastest updos on this list once you get the motion down, and it works on hair from shoulder length to longer. The finished look almost resembles a chignon but takes half the effort. It is a strong pick for second-day hair since the slight grip helps the tuck hold.
Crown Braid with Tucked Ends
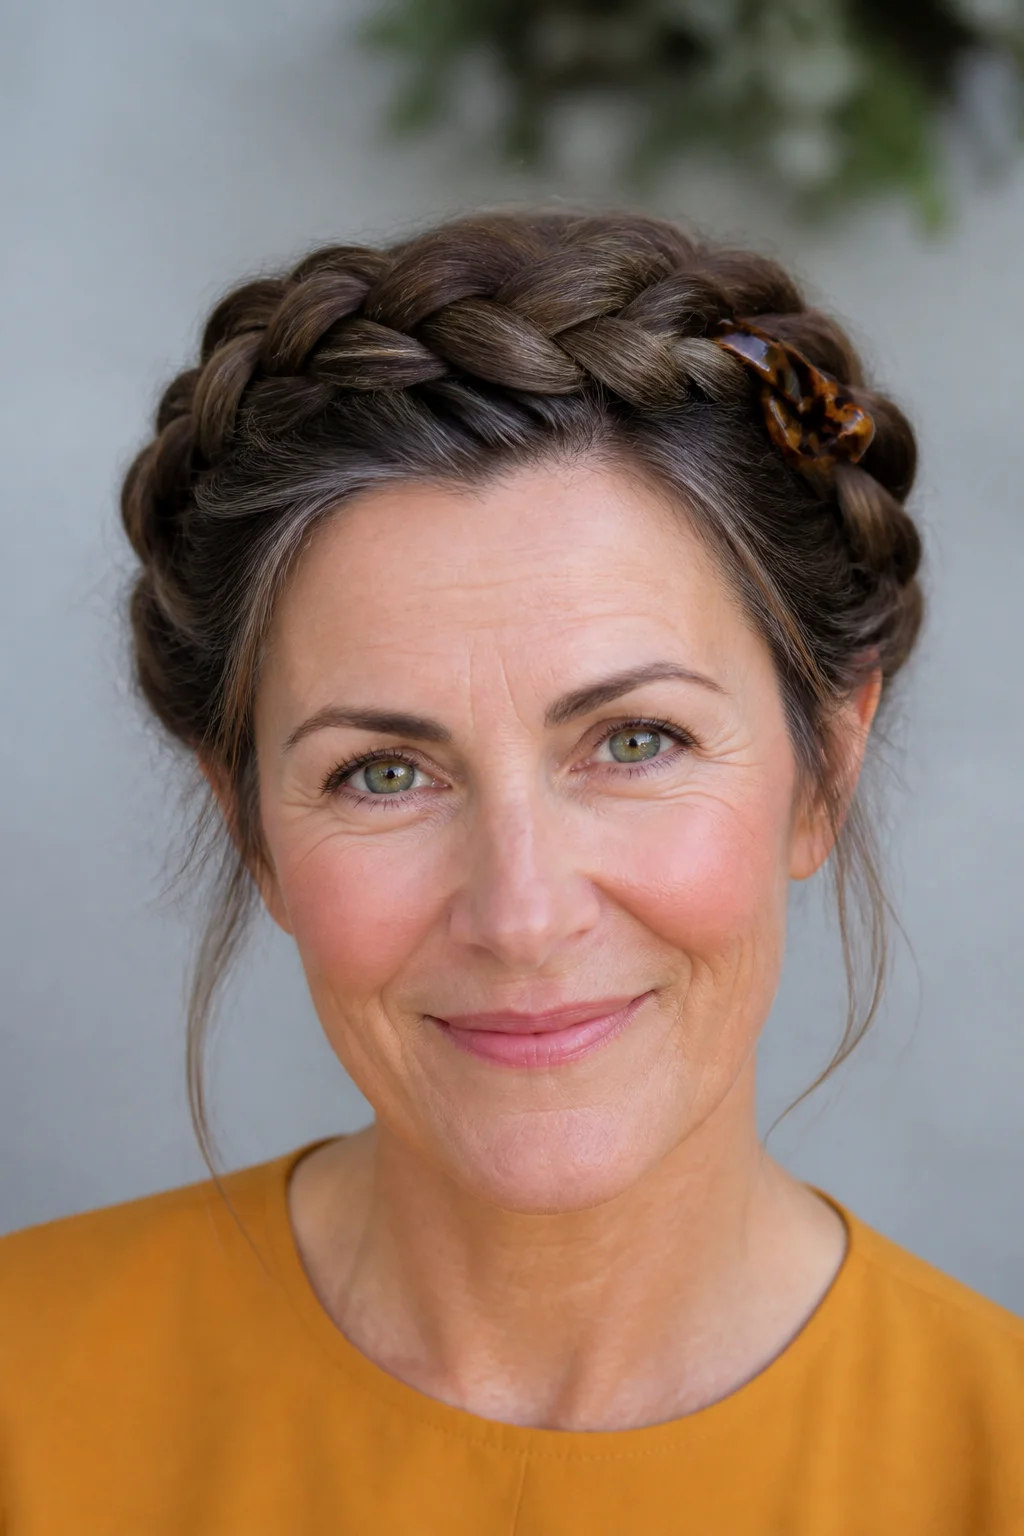
Braid a section from each side of your head toward the back, then cross and pin them so they meet like a crown, tucking any loose ends underneath. This style keeps hair fully off your face and neck, which makes it a favorite for warm days or long events where you need something that will not budge. It takes a bit more time than a simple bun, closer to ten minutes once you’re comfortable with the braiding. The payoff is a style that looks done by a professional, even though it is just two braids and a handful of pins.
Half-Up Crown Twist
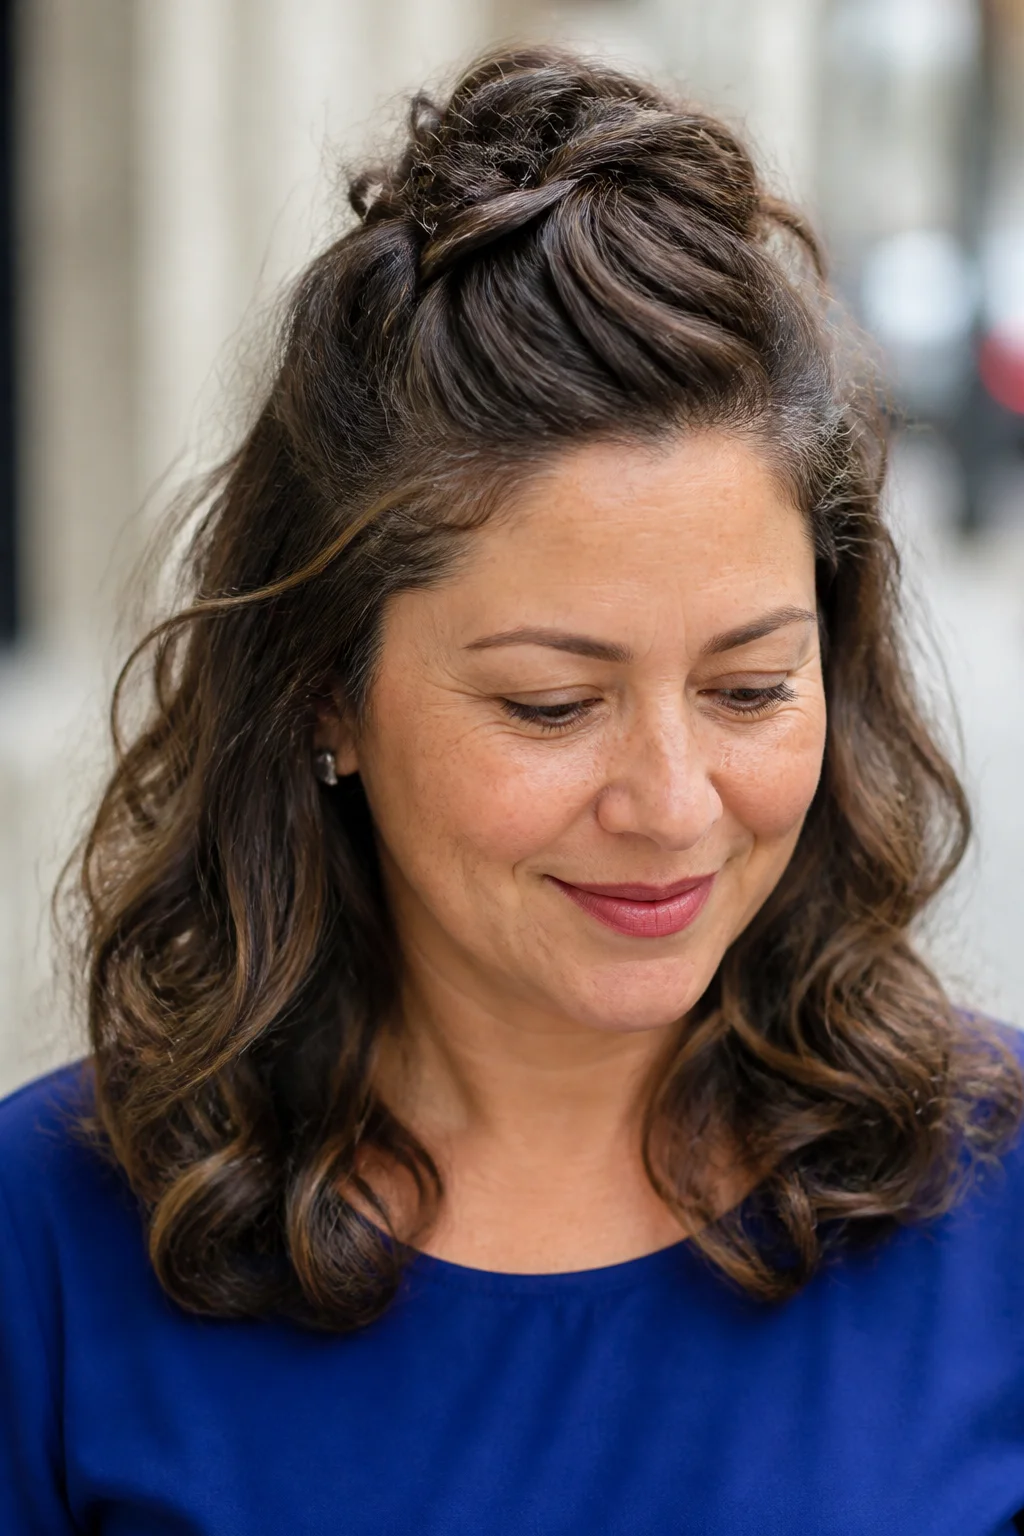
Take two small sections from the front, twist them back toward the crown, and pin them together where they meet. This leaves the rest of your hair down while still pulling it off your face. It is a quick five-minute style that works well for thinning crowns since the twist adds a bit of visual fullness right where you need it.
Half-Up Braided Detail
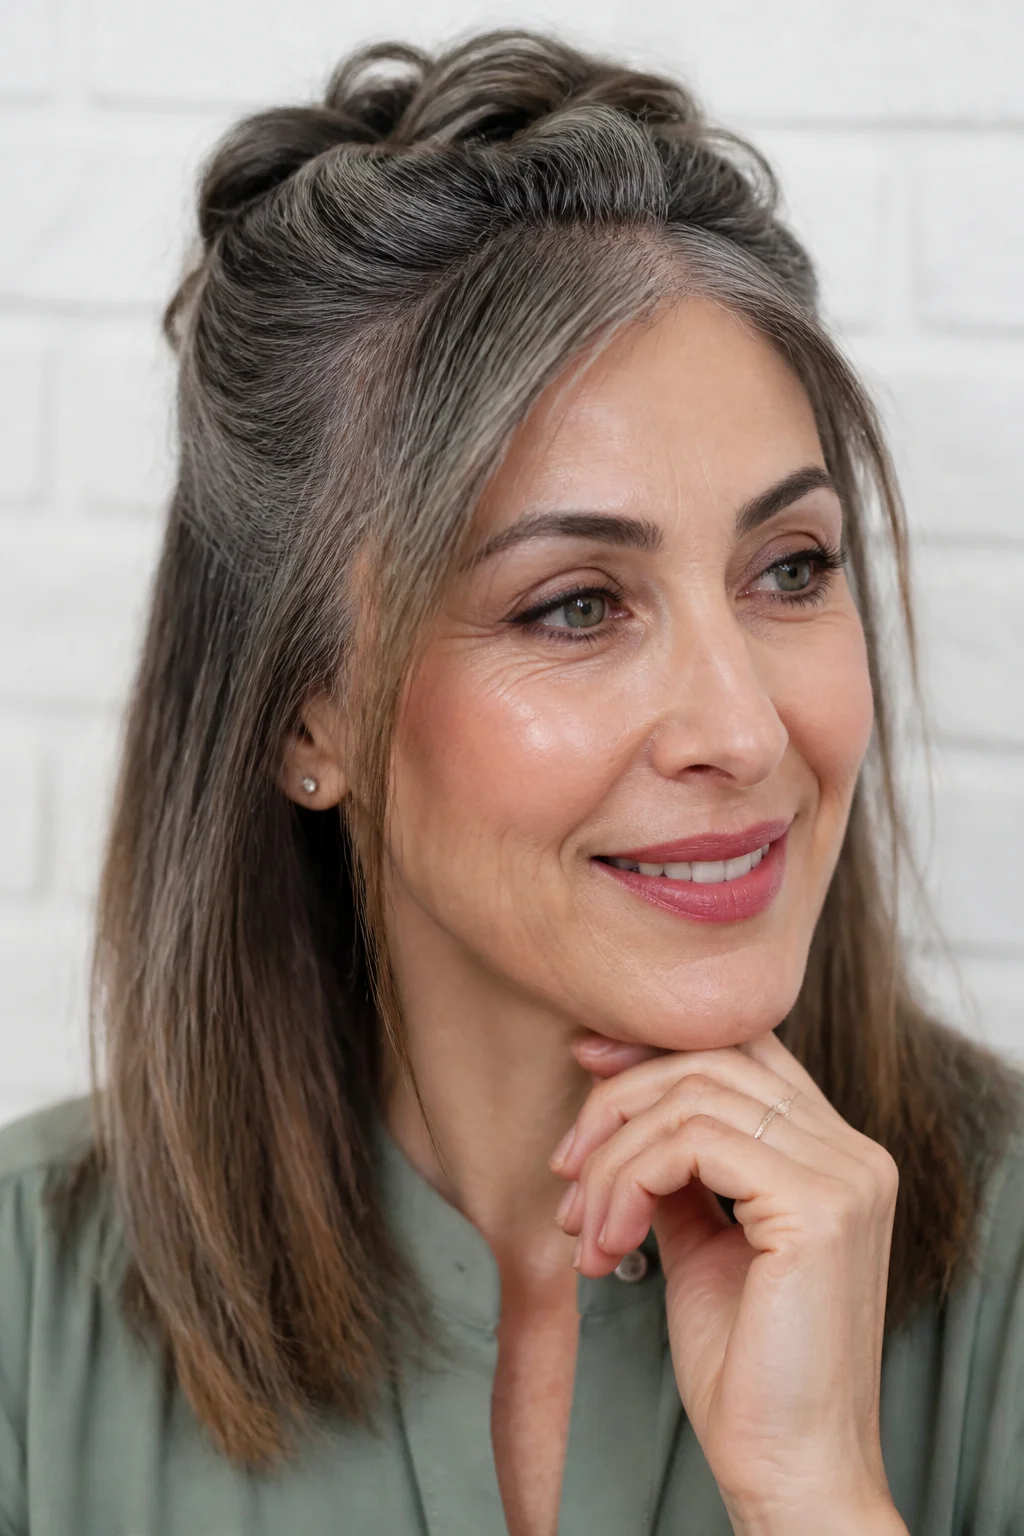
Braid a thin section from one side and pull it across the back of your head, pinning it into the hair on the opposite side. The rest of your hair stays loose and can be curled or left straight. This is a soft, pretty option for something like a lunch date or a photo, and the braid adds detail without requiring a full updo.
Half-Up Top Knot

Gather just the top half of your hair into a small ponytail and twist it into a mini bun, leaving the bottom half down. This gives you the lifted, pulled-together look of an updo with less commitment and less time at the mirror. It suits hair that is layered on top since shorter pieces will not fight the ponytail holder. Tip: use a small clear elastic instead of a thick one so the base of the bun does not look bulky.
Sleek Low Ponytail
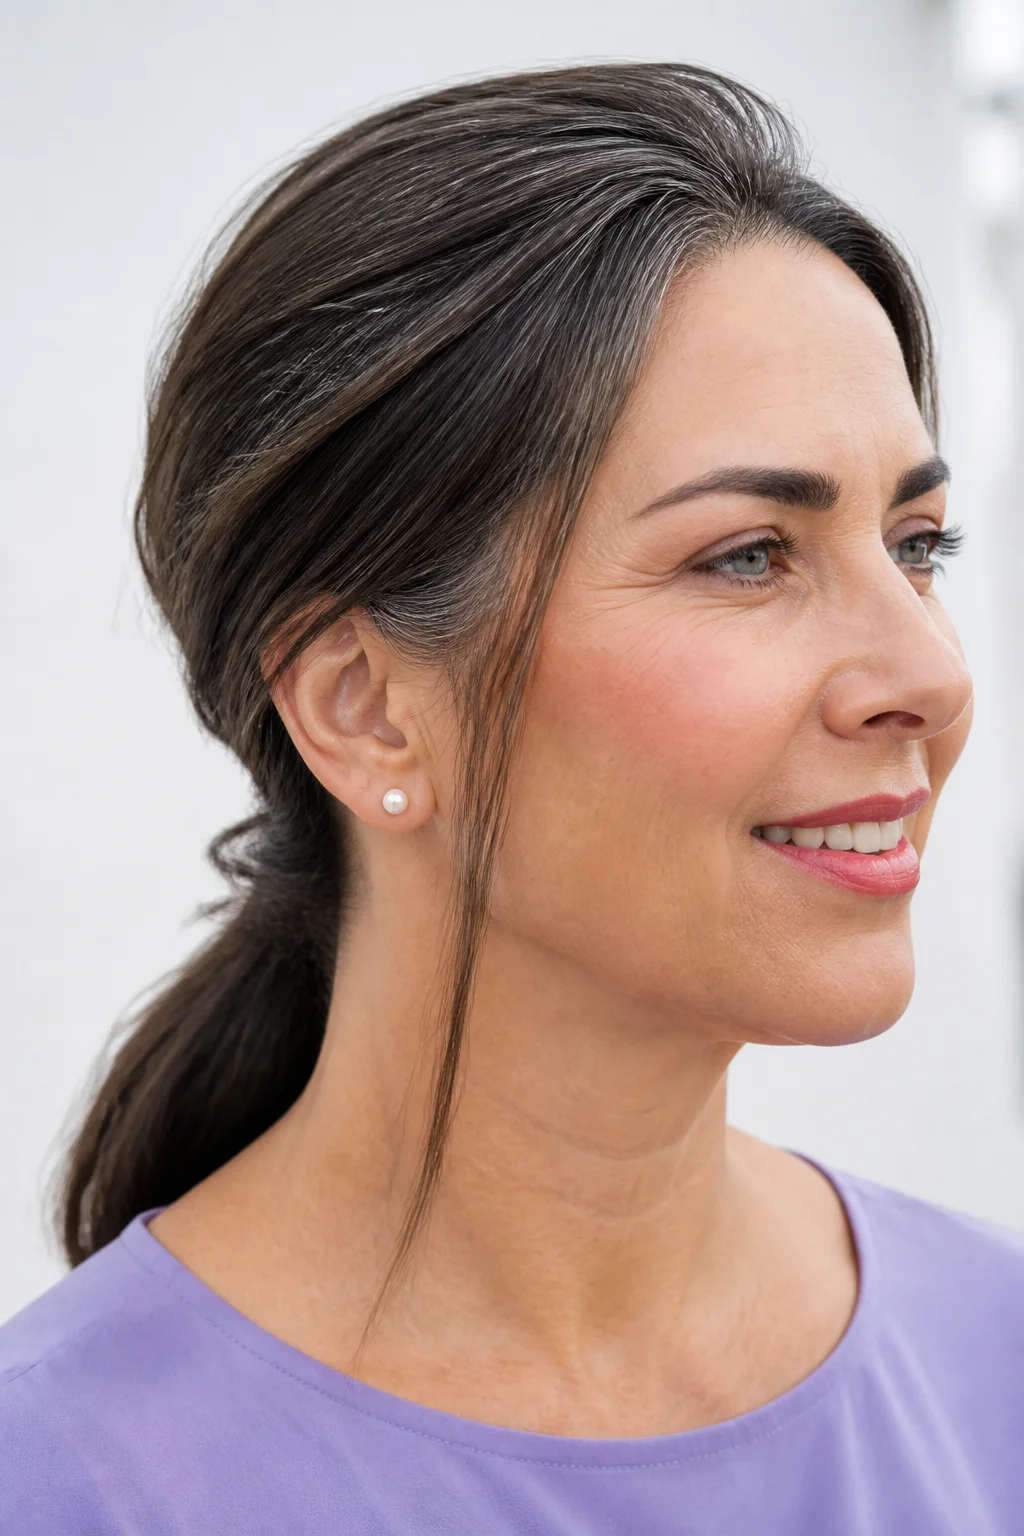
Smooth your hair back with a flat brush, gather it low at the nape, and wrap a small piece of hair around the elastic to hide it. This is about as fast as an updo gets, and it looks polished because of the smoothing step, not because of anything complicated. A little serum on dry palms before you brush back keeps frizz from ruining the sleekness.
Wrapped Low Ponytail
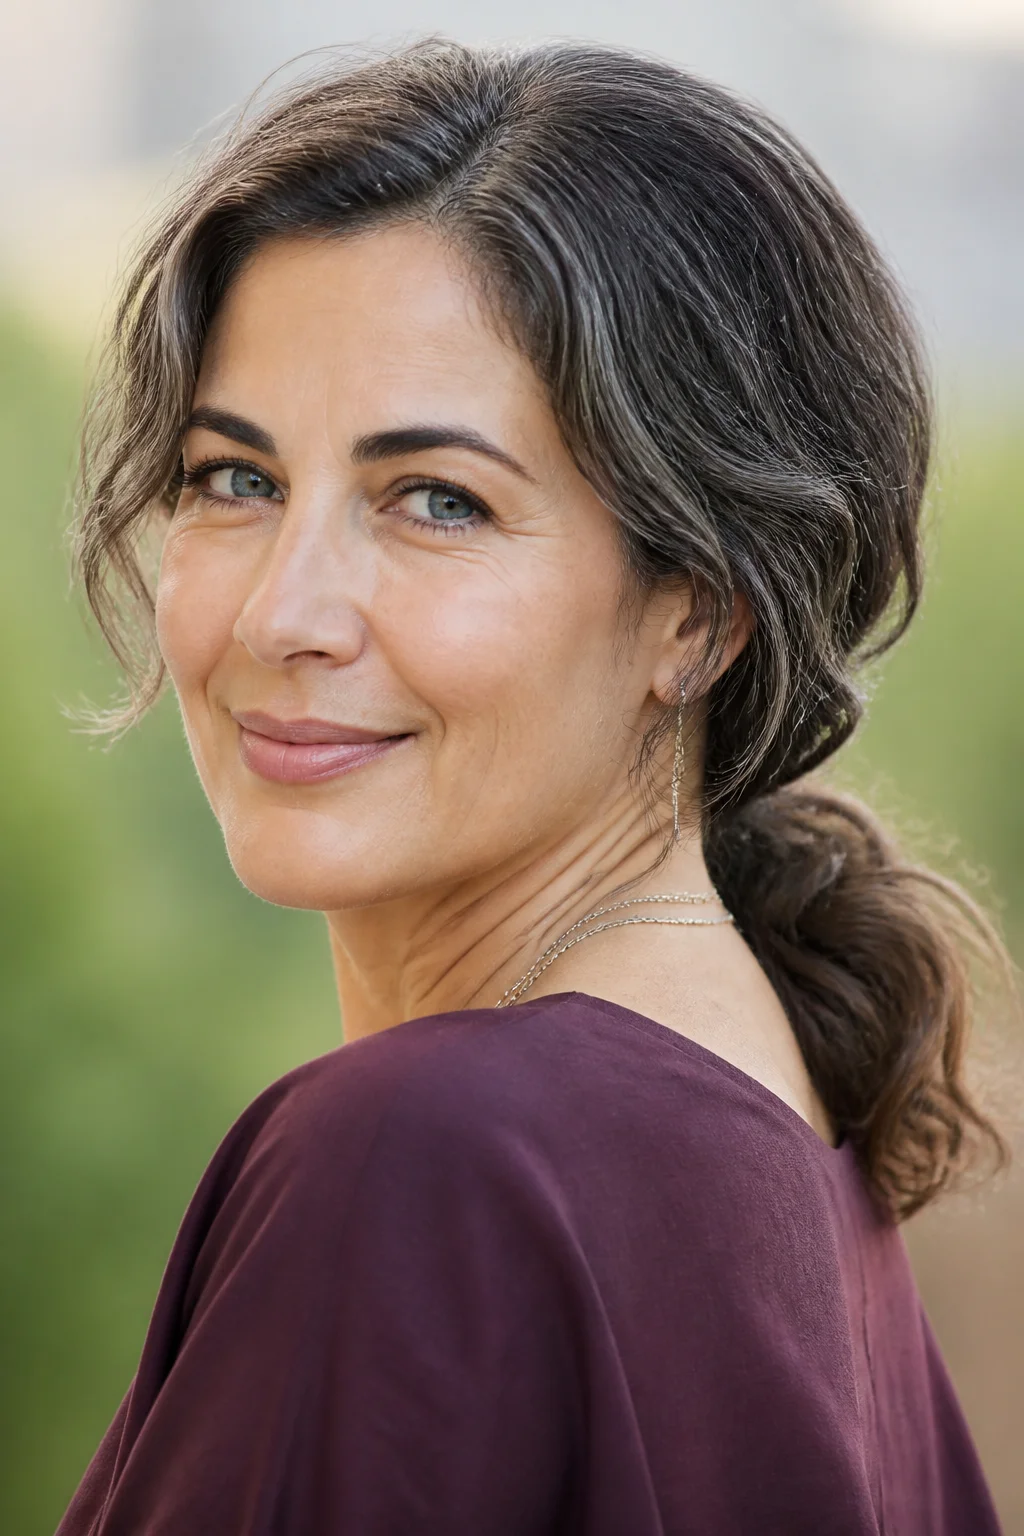
Start the same way as a sleek low ponytail, but instead of one wrapped piece, split the base into two thin sections and wrap them in opposite directions around the elastic. This hides the ponytail holder completely and gives the style a slightly more finished, styled look. It is a small extra step that changes the whole impression.
Side-Swept Ponytail
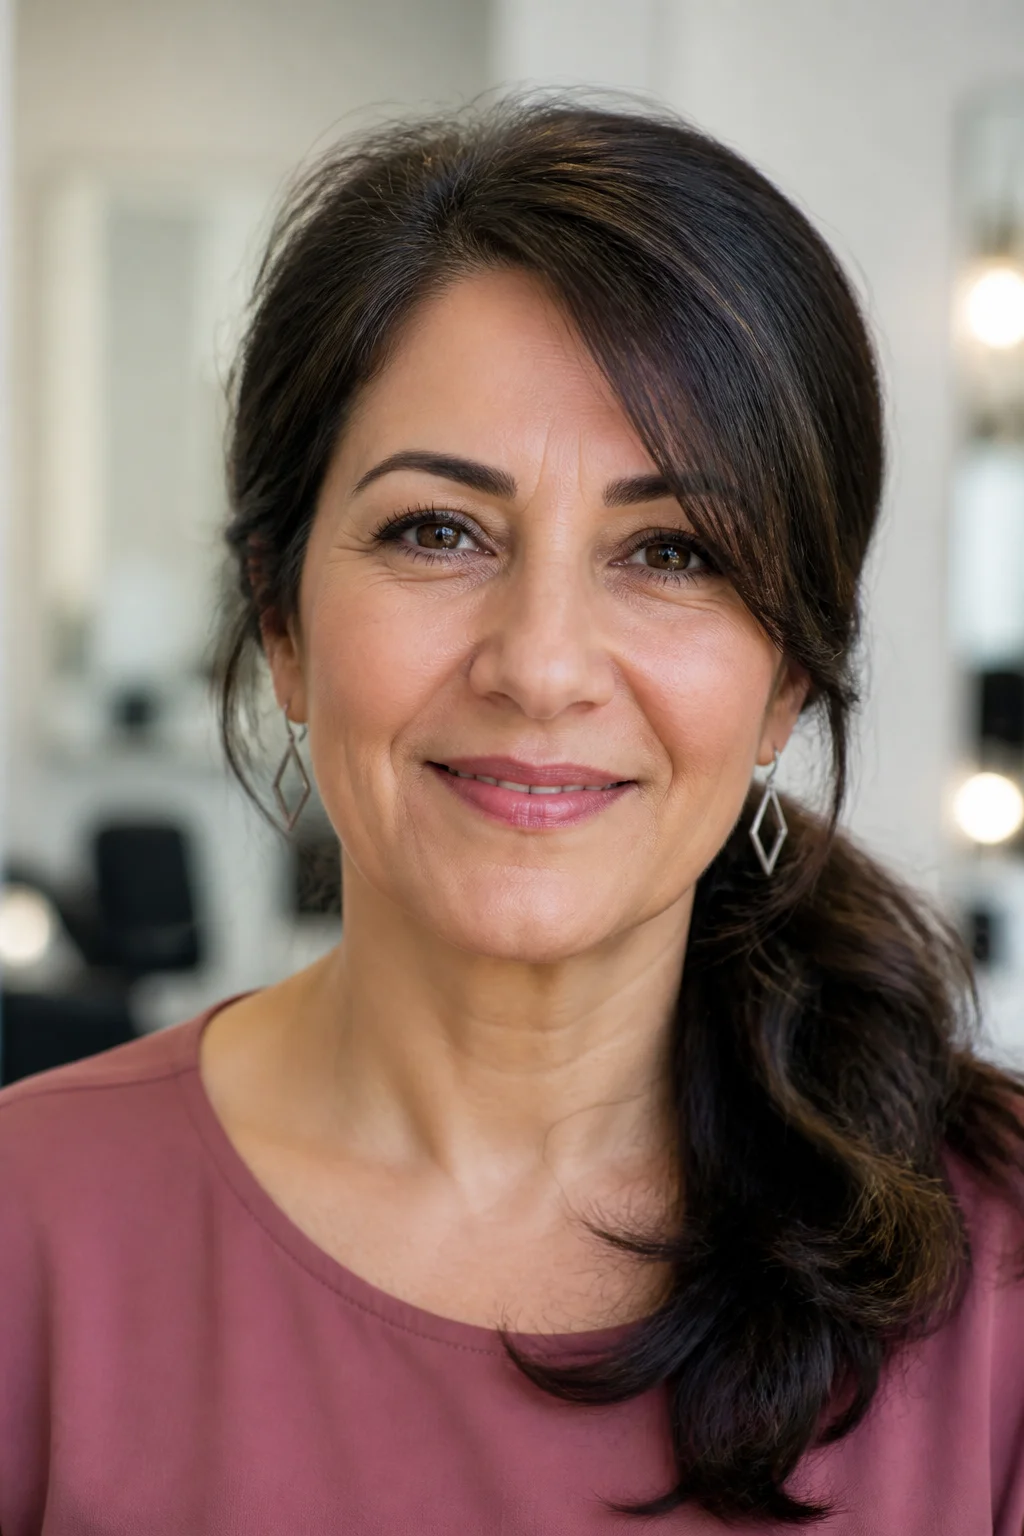
Gather your hair off to one side instead of centered at the nape, low enough that it sits near your shoulder. This asymmetry feels a little more done up than a centered ponytail without adding any real time. It works especially well with wavy or curled ends, since the movement shows more when it drapes to one side rather than hanging straight down the back.
Topsy-Turvy Ponytail Updo
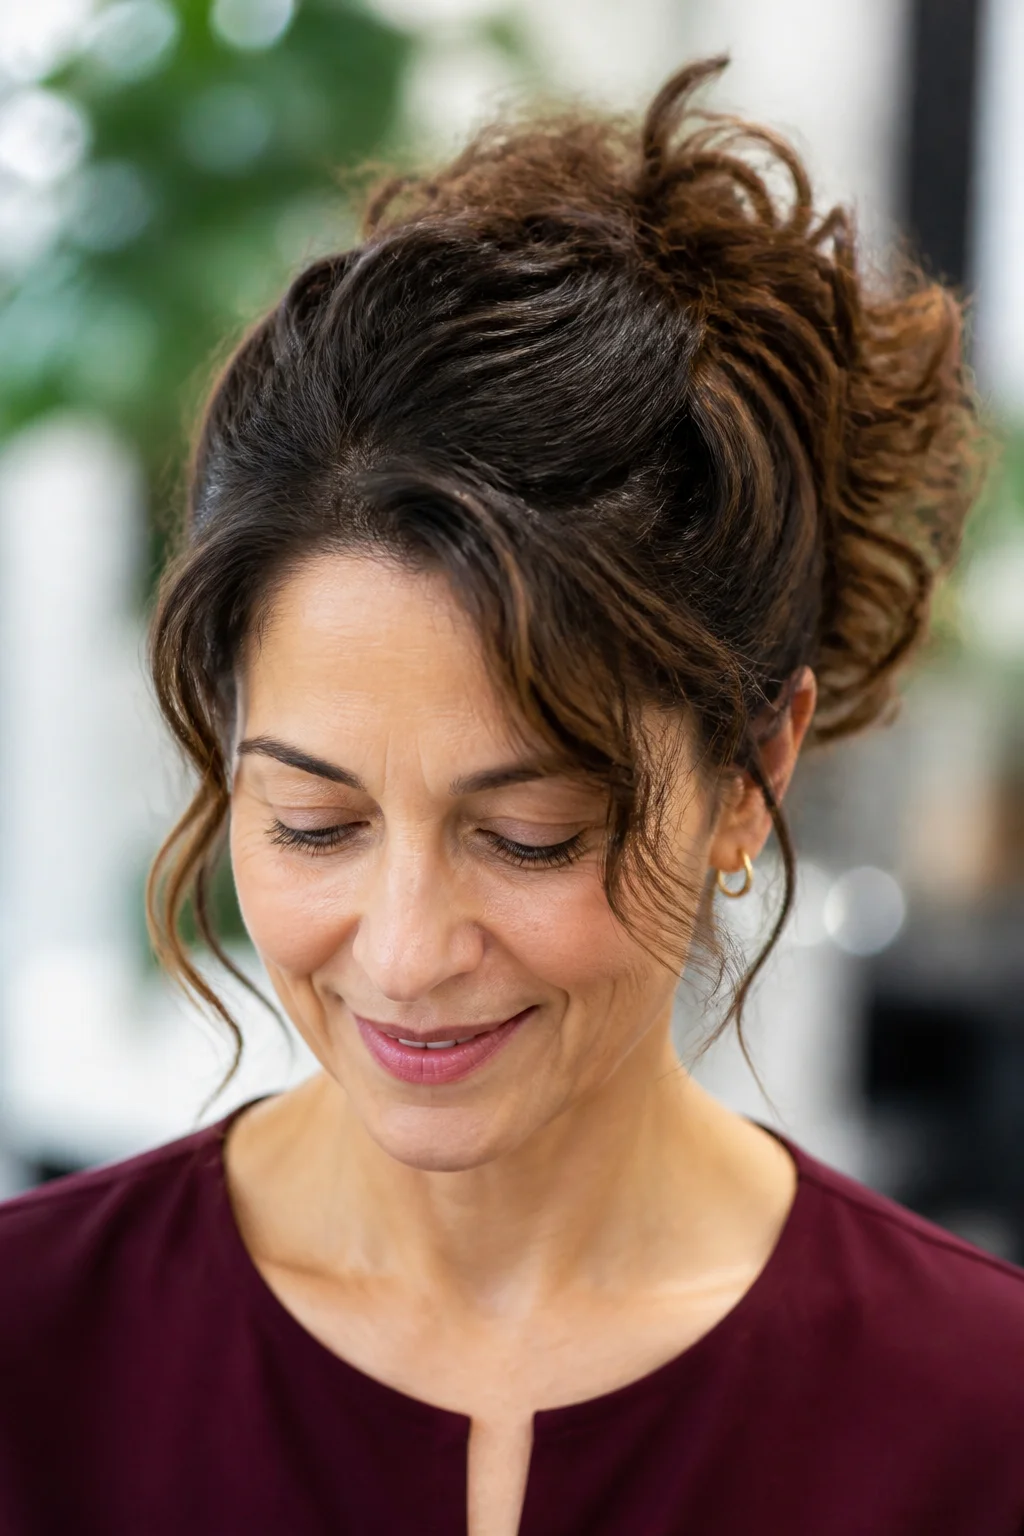
Gather a low ponytail, then flip it up and through a gap you create just above the elastic, turning the tail inside out on itself. Let the rest of the length hang or tuck it under for a fuller updo look. This trick takes seconds and instantly looks like more effort went into it than actually did.
Short-Hair Pinned-Updo
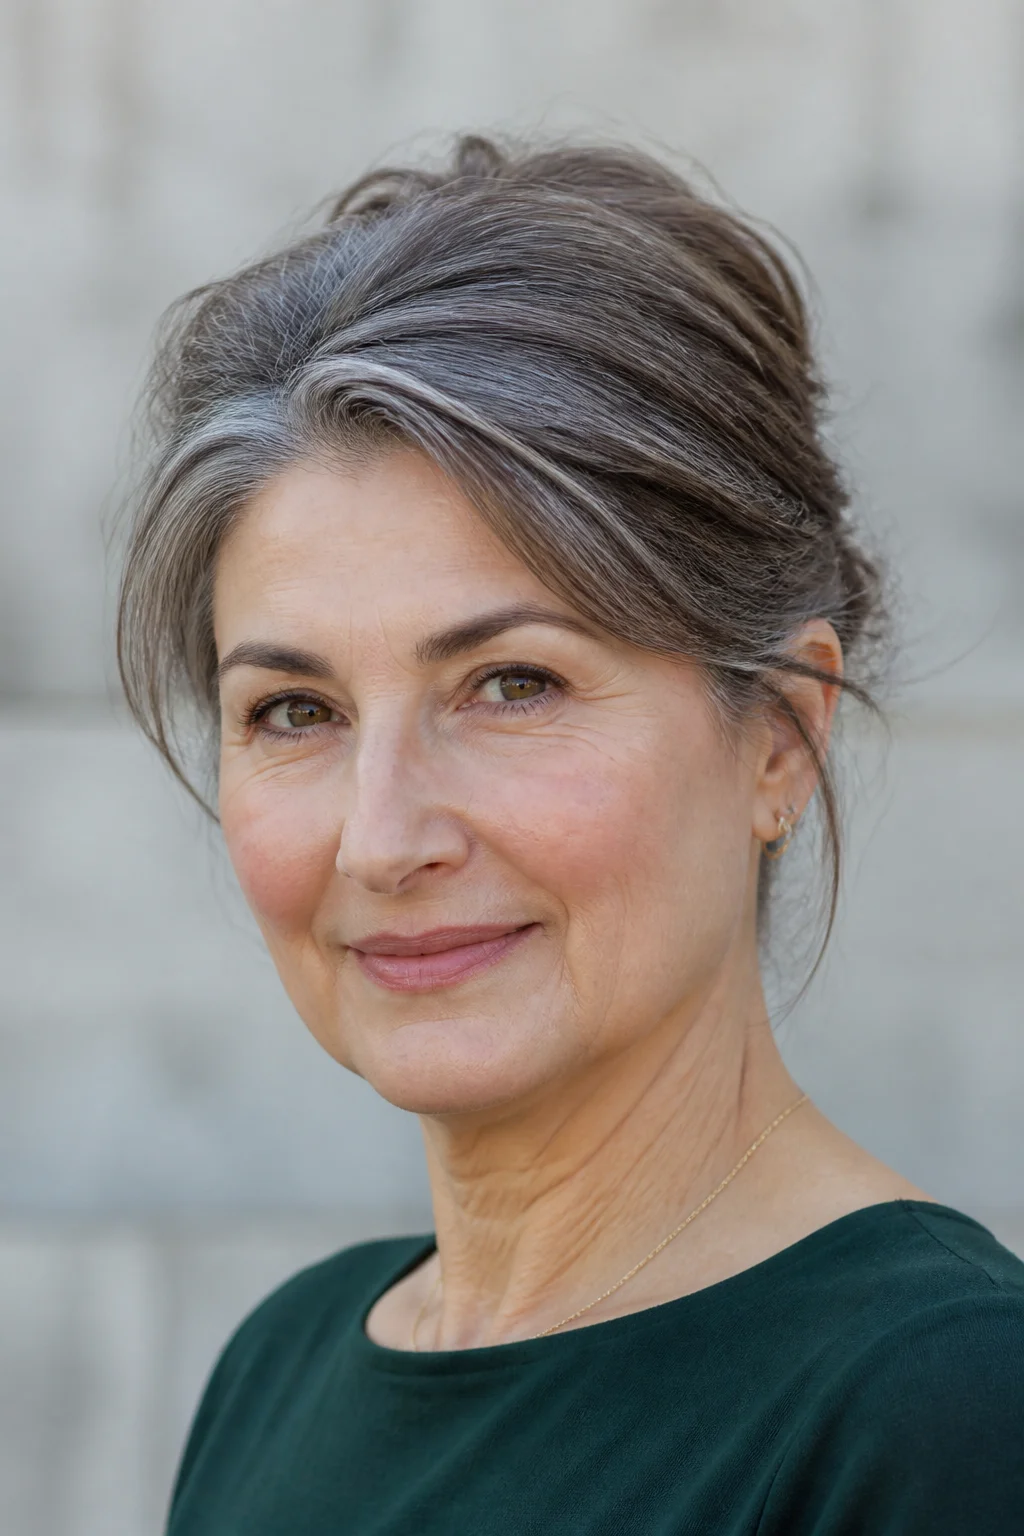
Even a bob or lob can go up with the right approach. Twist small sections at the sides and back and pin them toward the crown, letting any hair too short to gather stay down and blended in. This will not look like a full bun, more like a swept-back style with movement. It is a solid option for shorter cuts on days when you still want your hair off your neck. Tip: use pins that match your hair color so the ones holding shorter layers stay invisible. A light mist of heat protectant before styling helps the finish last.
Curly Pineapple Updo
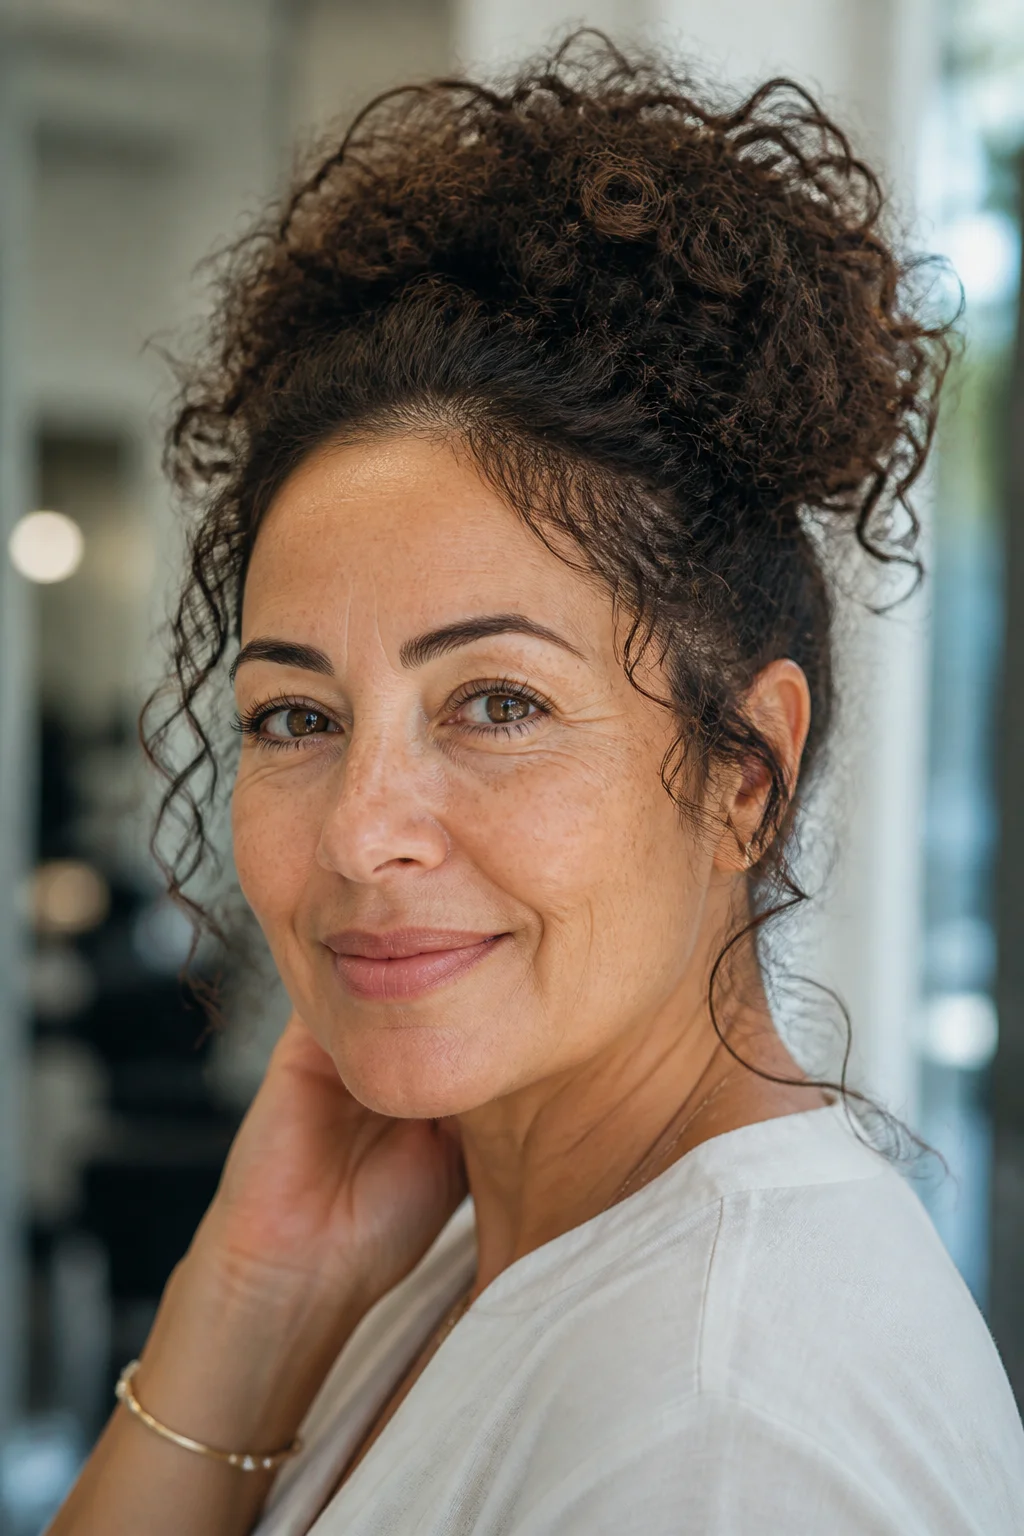
Gather your curls loosely at the very top of your head into a high, soft ponytail, letting the curls fall forward and around like a pineapple top. This protects curl shape overnight or keeps it defined through a humid day, and it takes about thirty seconds once your curls are dry. A silk scrunchie helps prevent breakage at the base compared to a regular elastic.
Scarf-Wrapped Bun
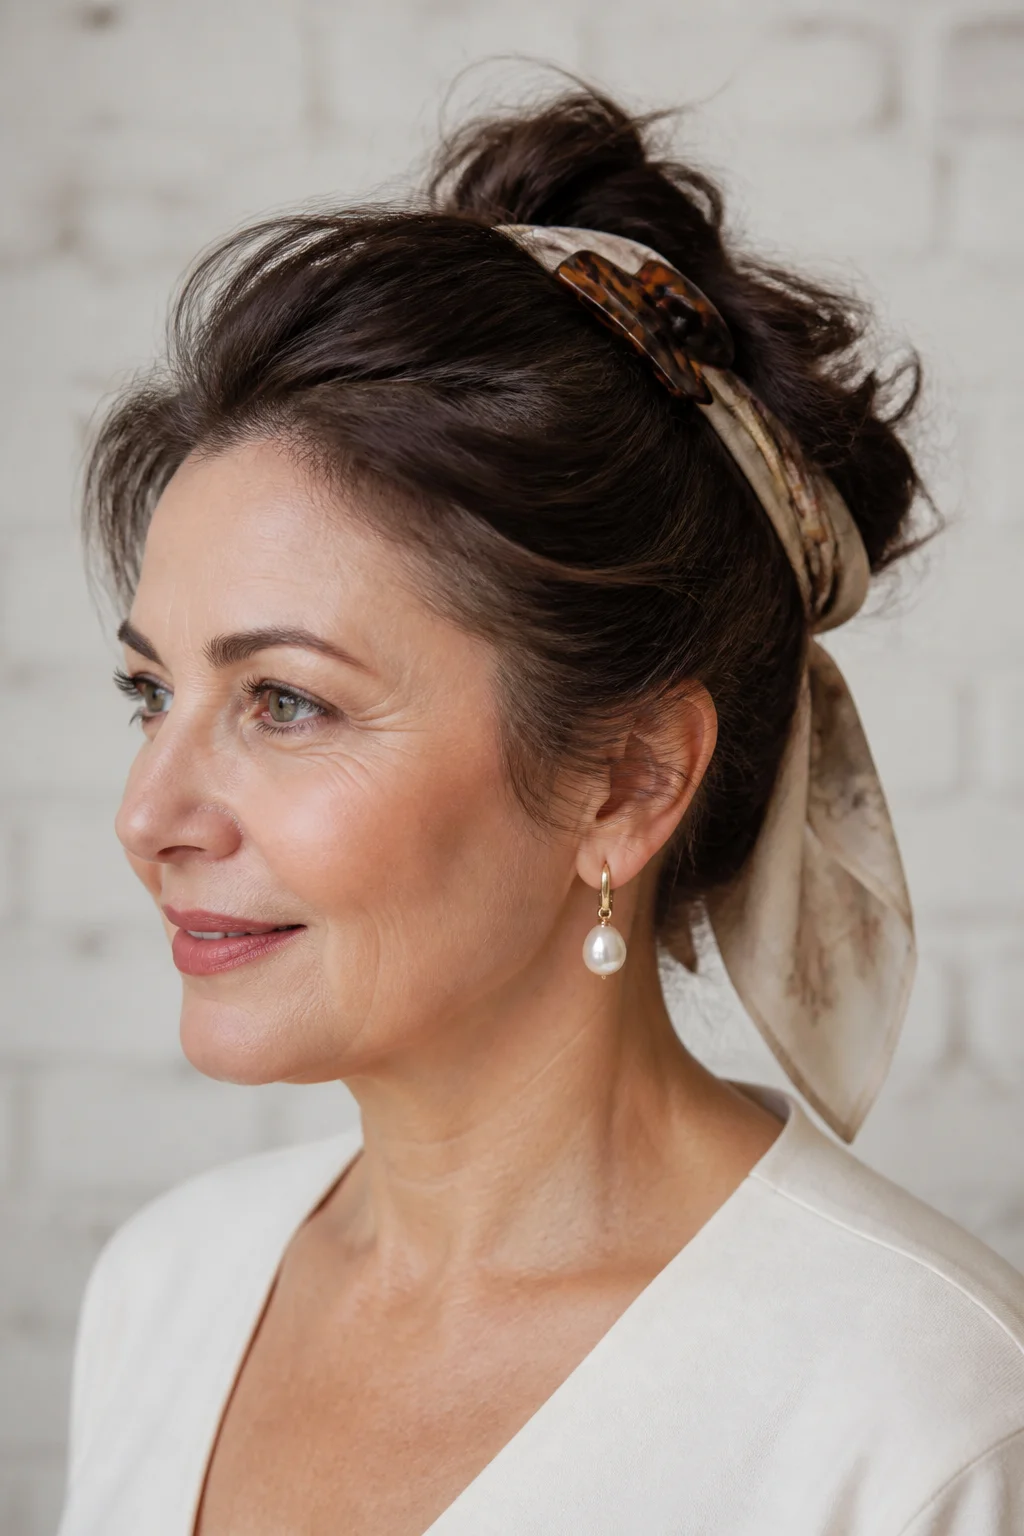
Twist your hair into a simple low bun, then wrap a square scarf around the base and tie it, letting the ends sit as a bow or tuck them under. This adds color and pattern to a plain style and covers any pins or flyaways at the root. It is a great trick when your hair is having an off day and you want the focus somewhere else. The scarf also adds a bit of grip, which helps on hair that is fine or freshly washed and slippery.
Which Updo Should You Actually Reach For?
With twenty options, it helps to sort by what your morning actually looks like. If you’re short on time, the Gibson Tuck, the Claw-Clip French Twist, and the Topsy-Turvy Ponytail Updo all take two minutes or less and need almost no skill to look neat. If you want something that reads more formal for a wedding or dinner, the Classic French Twist and the Crown Braid with Tucked Ends give you a finished, elegant shape worth the extra few minutes.
For fine or thinning hair, avoid anything pulled too tight, like a severe High Ballerina Bun, since it can look sparse at the part. Lean toward the Relaxed Messy Bun or the Top Knot with Soft Volume instead, since both build in a little lift and disguise thin spots at the crown. Curly hair does best with the Curly Pineapple Updo rather than a sleek style that fights the natural texture and causes frizz. A common mistake is choosing a style based on how it looks in a photo without checking whether your hair length or texture can actually hold it. Match the updo to your hair’s real behavior, not the picture, and it will hold up far better through the day.
Once you settle on two or three of these that suit your texture and your schedule, mornings get a lot simpler, and your hair stops being the reason you’re running late.